Deploying a static website involves more number of steps and will always take time. Because we have to create an account with a hosting provider, register your domain, install a FTP client and then upload your HTML files to the server. Phew! How many steps!!!
Netlify simplies all this to a couple of clicks and your static website will be up and running in a few seconds. Let's see how to use Netlify in this guide.
Netlify
Netlify is web-based service which lets you deploy a static website in a minute. You can deploy unlimited websites for free and they are offering a free to use subdomain in netlify.app. You can also use your own domain with your website. They also offer free SSL powered by Let's Encrypt with all your websites.
Step 1 - Signup with Netlify
Visit Netlify and create an account. You can use your email address or you can signup using your Github, Gitlab or Bitbucket accounts. You can view the plans available with Netlify in their pricing page.
Step 2 - Deploy your static site
Deploying your static site to Netlify is an easy process. Login to your Netlify account and your account homepage will be similar to the one in the image given below. You just need to drag and drop the folder containing your static site to the area marked in the image to deploy your static website.

Step 2.1 - Netlify subdomain
Once your site is deployed, you will be assigned a subdomain from netlify.app. You can use automatically assigned subdomain or you can change it to your prefrence by going to the "General" tab.

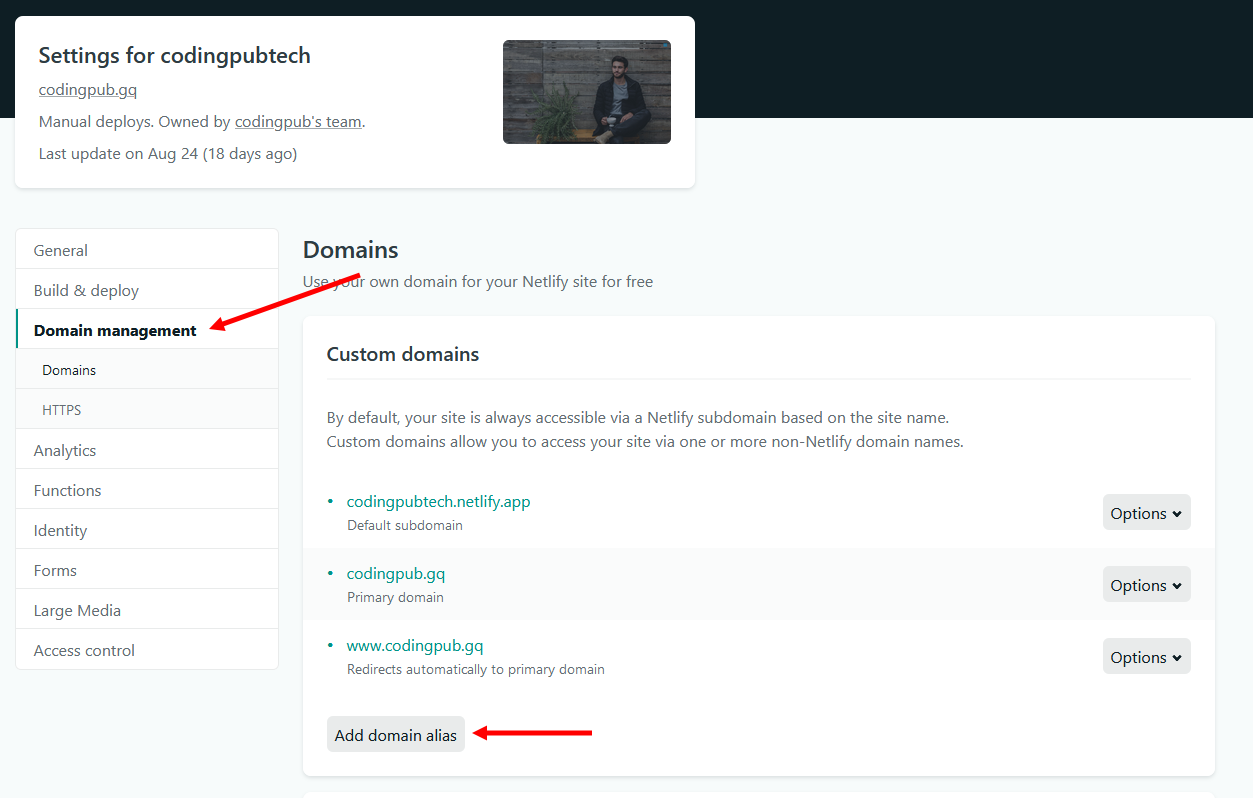
Step 2.2 - Deploy to your domain
You can use your already existing domain or you can create a domain for free at Freenom. Go to "Domain management" tab and add your domain.
Then go to your domain's DNS editor and create the following DNS records:
@   - TXT   - 104.198.14.52
www - CNAME - codingpubtech.netlify.app
In the place of codingpubtech.netlify.app use your own netlify subdomain.
You can deploy your future changes by dragging and dropping your website folder. Your site is now deployed for free at subdomain.netlify.app or yourdomain.com depending on the method you chose.
You can see a detailed demo of Netlify in the YouTube video given above. Feel free to post your comments.